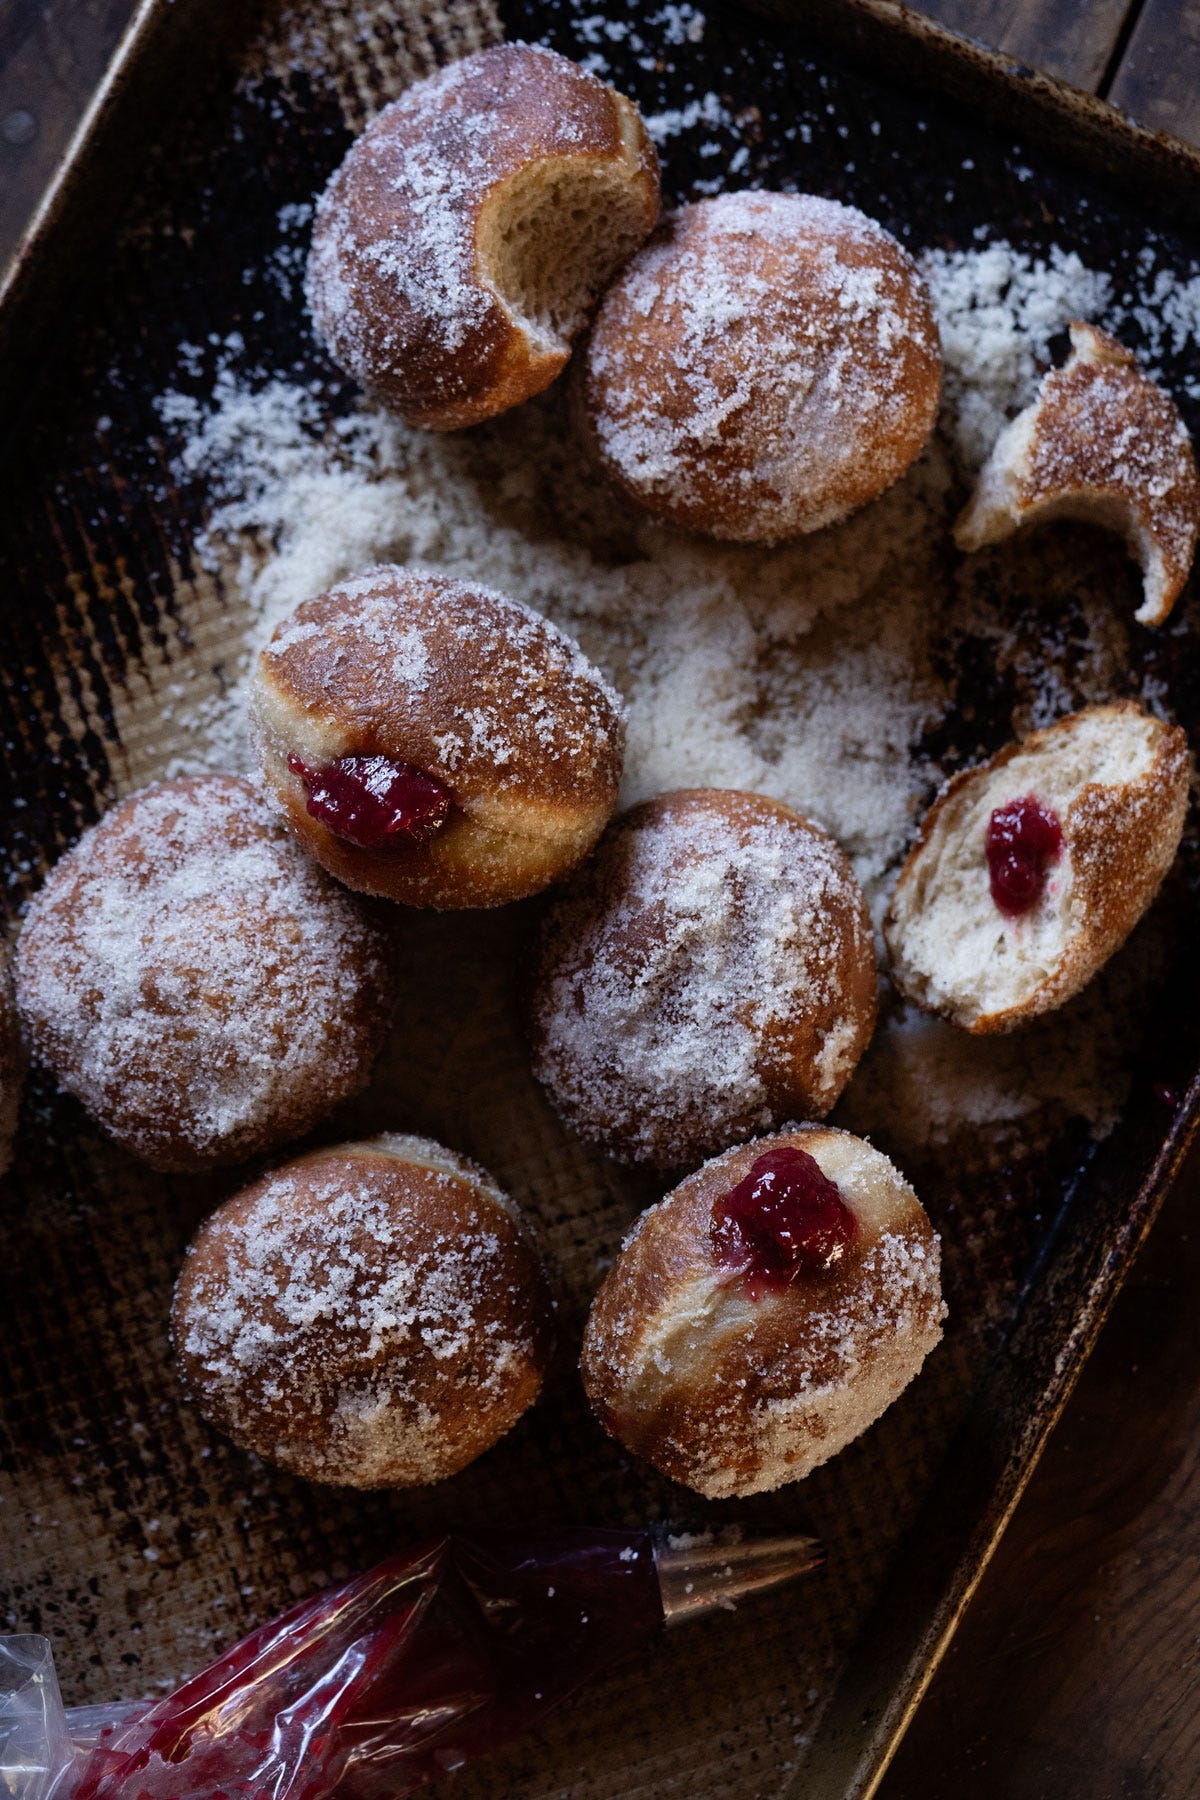
And so herein lies proof that fluffiest doesn’t, in fact, always equal best.
but first: Paola, where’s my starter?!
what I’m saying: lost in the tundra that has become the US of A these past two weeks. Kidding (kind of), as I definitely had to halt the shipping given that most of the country found itself in negative digits (like in all seriousness… is everyone ok?!)(I heard Montana saw -75°F with windchill!)(and omg Maine!!).
So yes– this week was somewhat humbling as our mighty Yosemite is sensitive to either extreme cold or heat, so we’re going to do things different in order to ensure success and I fulfill the pending orders (I’m so sorry if your order wasn’t in the first batch and you haven’t received a tracking number from me yet- you will next week):
as we have *perfect* weather incoming all across the country, so I’ll be closing orders on Saturday in order to ship them all promptly next week (then I might do the little gift again in February or March, depending where life’s storms take us)(but I’m so glad so many of you are signing up, I’m just afraid I won’t keep up if I keep this rolling all January lol)(but you guys know I’m easy, so if you sign up in between offers I’ll obviously ship you one ok? we just need to work around the weather a bit smarter in batches rather than on a rolling basis)
and in case you’re new here or just catching up:
I’m mailing my 100yr sourdough starter (alive!!) to you 🌋
I’m gifting everyone US-based with a yearly subscription until Saturday a little live clone of my prized starter to get you started on your sourdough adventure (they’re generally worth around $30)(and are much more valuable than a dehydrated one, as its a culture that’s been maintained for decades… and it shows).
because what you’re skipping: four to six months of daily feedings to create an “established colony”:
p.s. already a subscriber? simply hit reply to my email with your full deets (address + phone number pretty please!)
OK. But now I give you (not the fluffiest) sourdough donuts. And by this I mean that I compared a few methods of whipping up donuts (prime examples being using a regular active starter vs our new shining star: the sweet stiff starter)(and a few different styles… which vary a tad across countries) and this was my absolute favorite batch… in spite of not necessarily being the fluffiest.
(because side note to what Gretchen said about our cinnamon rolls: Sss is a game changer. My daughter wanted cinnamon focaccia, I used this starter, modified my recipe as needed... holy cow! Talk about amazing! You are amazing! This is amazing. I'm starting the cinnamon roll process tonight for my daughter and coworkers to try. The focaccia went over so well with her and her friends, the rolls should be a hit as well)
i.e. I’m hoping the rolls ultimately also worked out Gretchen (!!), but don’t sleep on trying the sss guys– it really does yield an impossibly soft and fluffy dough (while also effectively halving the bulk proof so they don’t take that much longer than with regular yeast).
That said, these guys don’t employ a sss as I wholeheartedly believe that fried dough with a denser bite is better.
(though I will also give you a donut recipe with a sss soon because those did lend themselves for the best, like literally the best, boston cream donuts– like there you do want a more delicate crumb so it doesn’t fight the light pastry cream)(but yeah, now I’m just being picky lol… but take it as a sign that I tried way too many donut types to give you this rather simple sourdough recipe).
but herein lies the key 🗝️
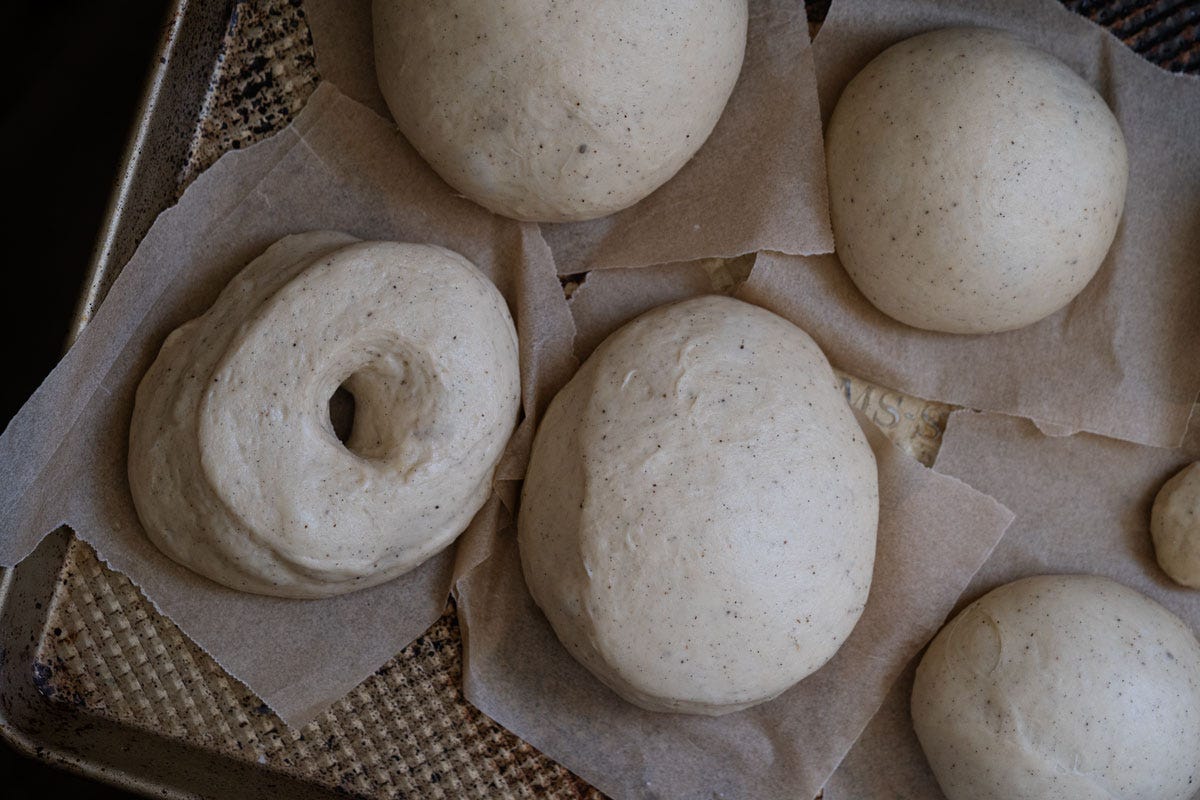
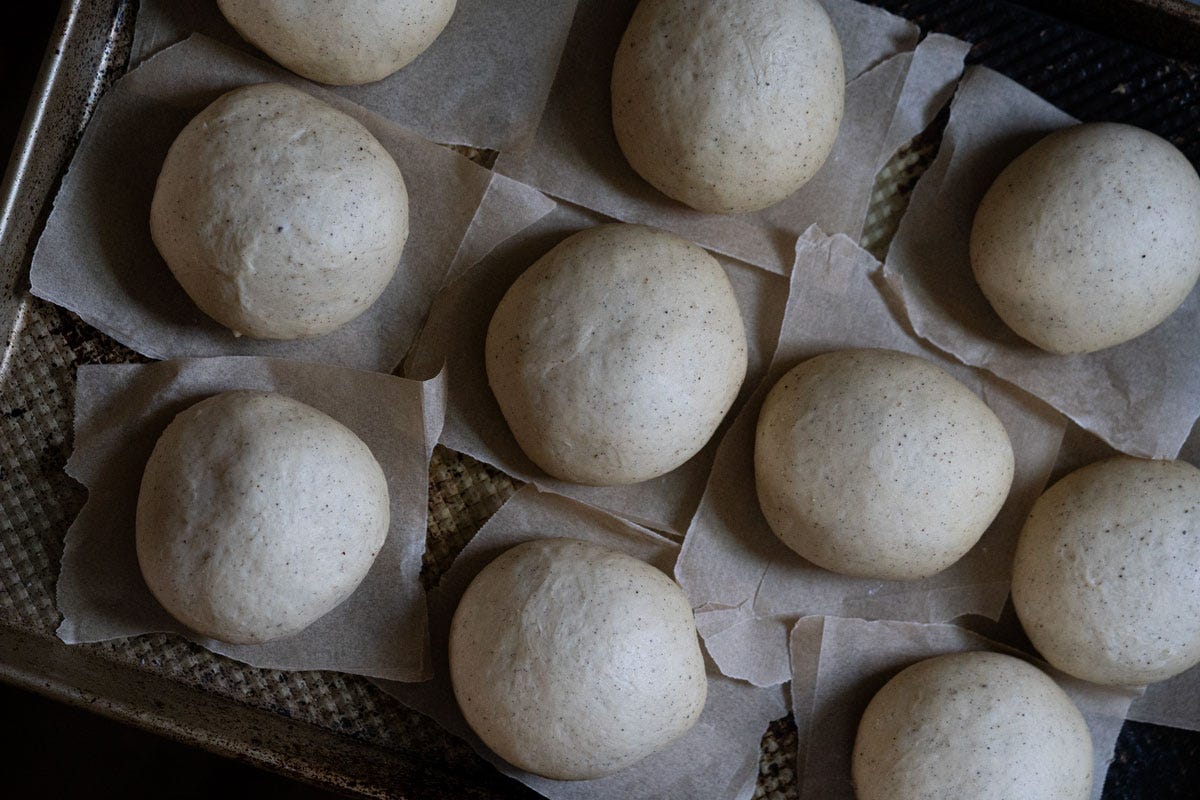
In the shaping! The dough in unfuzzy but I got very fuzzy with the shaping. You see, doing cutouts (i.e. the American way, see the two donuts in the bottom of the picture below), tend to yield a bulkier result crumb wise.
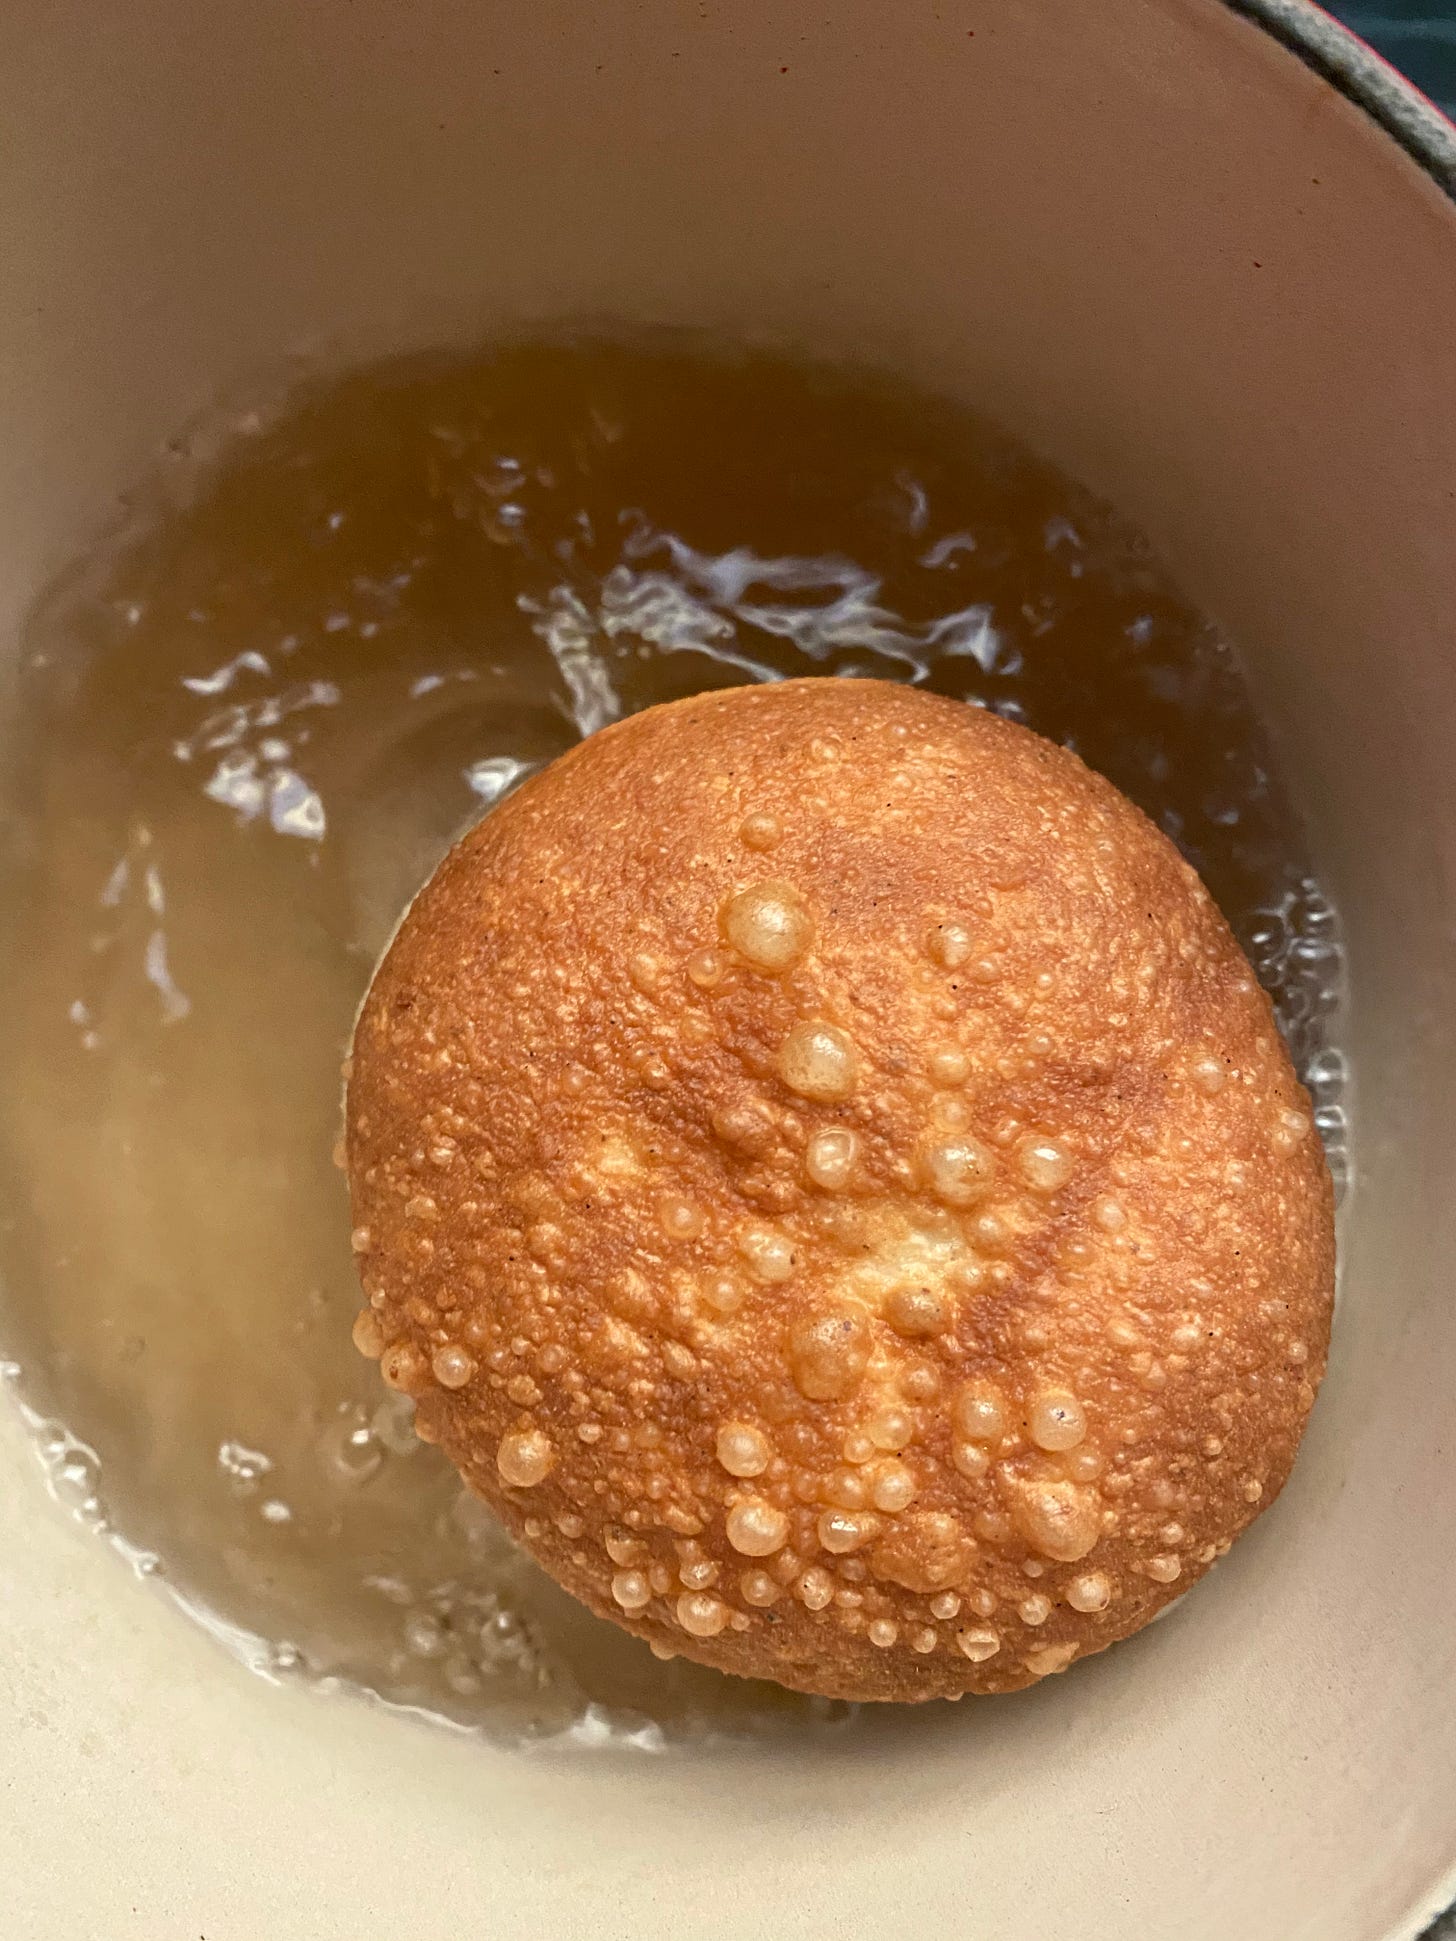
So rather than simply rolling out the dough and cutting it, I want you to actually take the time to shape it into little rounds (in order to create proper tension in the dough)(and its what also leads to all those nice bubbles when frying!).
The result?
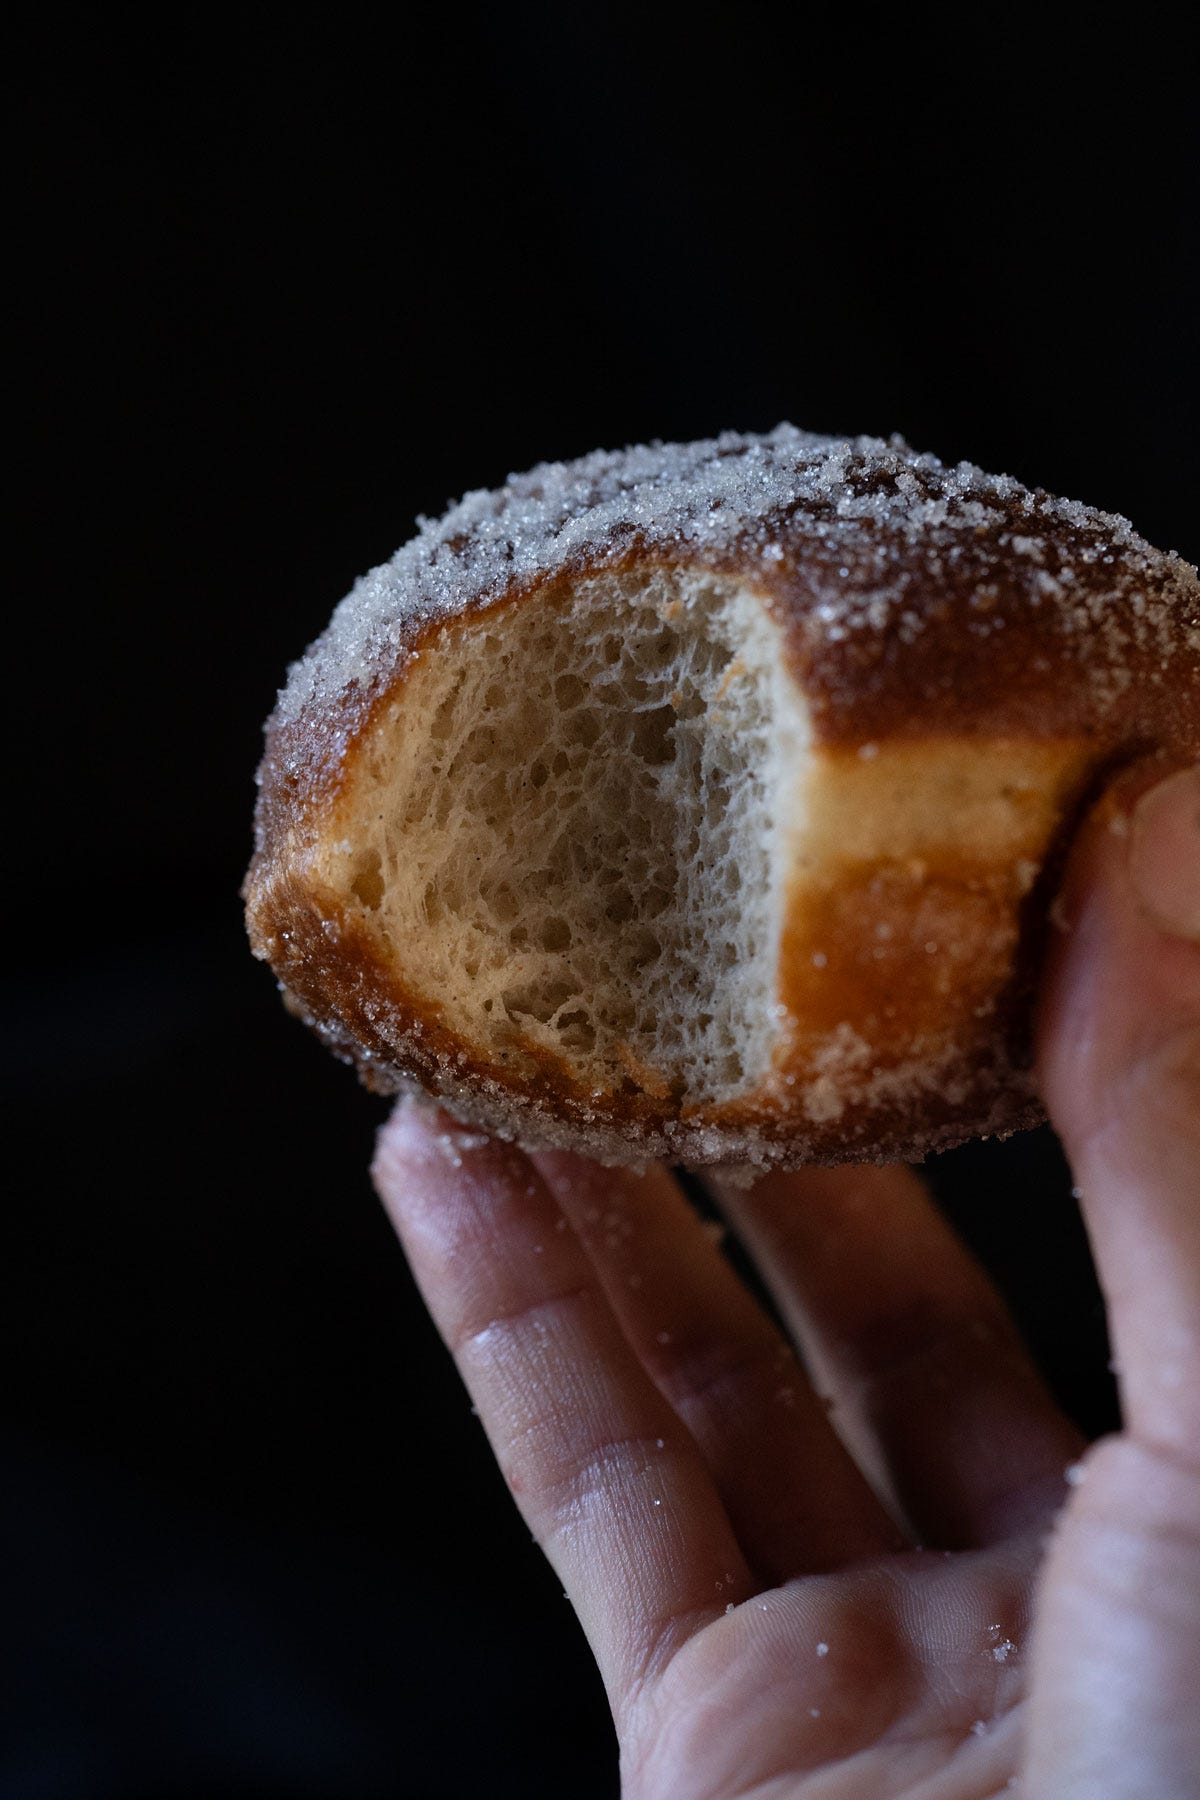
Some pretty damn fluffy donuts (for not being the fluffiest)(you gotta catch an eye on those lol).
But herein lies proof of how important learning to shape your dough is:
(not the fluffiest) sourdough donuts ☁️
But my personal favorite.
It makes 11 donuts (or quite a few donut holes… so may the force be with you if you decide to go down that route with the entire batch).
for the dough
100g active sourdough starter
1 large egg + 1 yolk, at room temp
24g (2 tablespoons) raw honey (maple syrup or granulated sugar of choice)
42g (3 tablespoons) unsalted grass-fed butter, melted (but at room temp)
160g (2/3 cup) whole milk, at room temp
330g (2 3/4 cup) unbleached bread flour*
5g (1 teaspoon) fine sea salt
1 teaspoon vanilla bean powder (optional, but its an awesome good-value ingredient)
and coconut or avocado oil for frying
for the filling
raspberry jam of choice
(or simply make a compote at home by cooking down fresh or frozen raspberries, with a little honey to taste and the juice of half a lemon)
for the coating
granular sugar of choice
6 p.m. feed your starter
Add roughly 50g of flour to feed your starter (you want 100g of active starter for the recipe, so it depends on how big you keep your starter (say you may want to feed it for a couple days without discarding if you keep a small one going)(or if you’re taking yours out of the fridge you’ll def need to do one feeding before it’s strong enough to bake with).
Add enough spring water (you don’t want filtered, you really do want the added minerals) until the dough resembles a thick pancake batter. Generally 50g of water/50 g of flour (i.e. a 100% ratio) is enough to get the consistency right (but if you're dealing with warmer temperatures you may want to do just 70% to have a more stable starter).
Allow to rest for 3-6 hours in a warm(ish) place: until it doubles in size. You can test for prime activity fairly well either using the float test (as it sounds: check if your starter floats in a little water) or the burn test (tap your starter on the counter to “break the surface”, light a match and if it blows out it means your starter is using up all the oxygen in the surrounding area i.e. it’s sourdough time).
9 p.m. make your dough
My best advice: just ensure everything is at room temp to give your culture the best fighting chance. Other than that, you’ll be surprised how simple the process is (and how little you have to do, it just takes time).
Add starter, egg, yolk and honey to the bowl of your stand mixer and mix, until just combined, using the paddle attachment. Add in the butter and milk and mix again.
Set your mixer on low and add the flour in parts until just combined. Add in the salt and continue mixing until everything looks nice and incorporated (about a minute). Yup, the dough is pretty sticky at this point!
Cover with a damp paper towel and let it rest for 30 minutes.
Switch to the dough hook attachment on your mixer and “knead” on low-medium speed for 6-8 minutes. The dough will be sleek and pull away from the sides at this point (if it isn’t, just sprinkle a tad of flour at a time, think a tablespoon or two, and kneed for a bit longer).
10 p.m. bulk rise (plus stretch ‘n fold )
Transfer to a smaller bowl (as it’s easier to gauge the rise if you can actually mark it with a sharpie) and cover with cling film.
Thirty minutes in you’ll want to do a set of “stretch ‘n folds”: grab a hold of the dough, stretch it upwards and fold it down towards the center of the bowl. Rotate and repeat four times (you can watch me do it here).
Allow to rest for 8-15 hours, or until at least doubled in size (but I generally let mine go until it almost tripes). I’ve pushed it just until the point that it begins to recede back and it still comes out superb (and I personally find it easiest to digest).
My top tip, though: unless I’m specifically planning a breakfast bake, I generally refrigerate the dough once it has nearly doubled in size and then I simply pull it out two hours before I want to bake it (and hopefully by then it would’ve nearly tripled in size!).
6-12 a.m. shape (watch the video for deets)
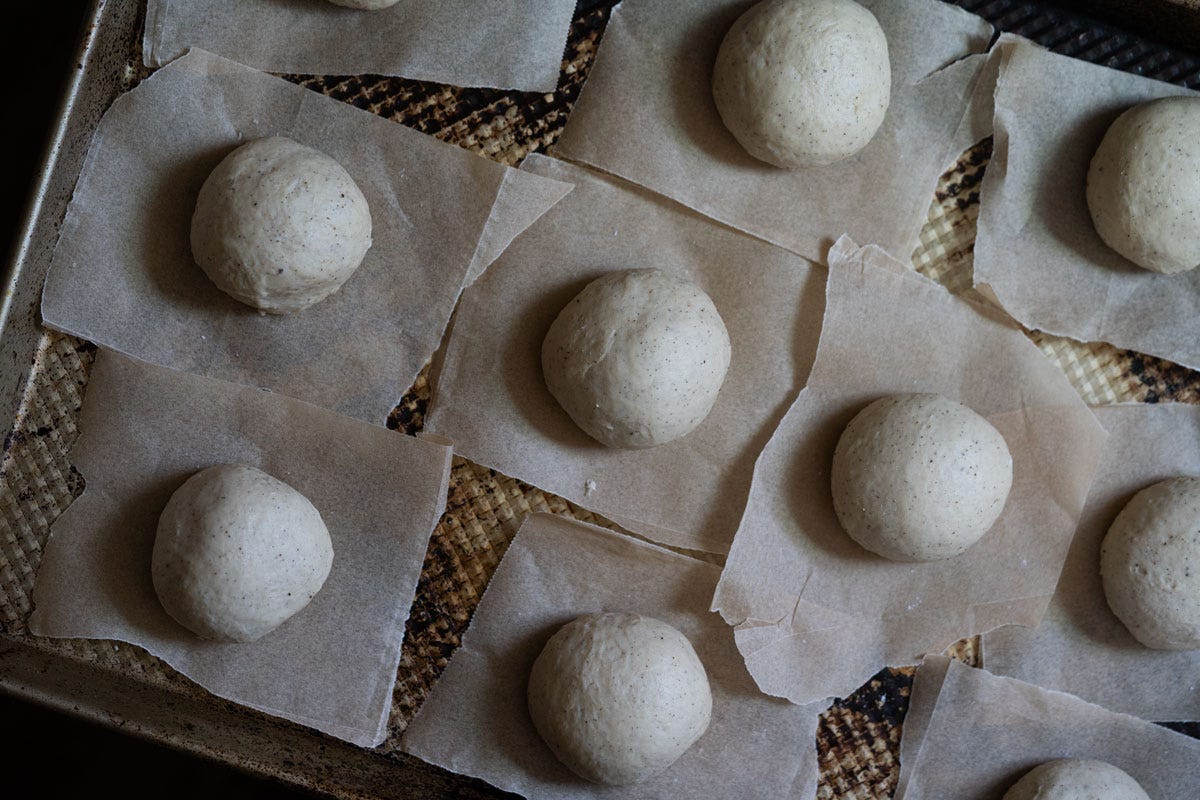
Worthy of note: I proof each donut on an individual little piece of parchment as they’re super fragile once fully proofed and its much easier to dunk them in the oil this way.
Divide the dough into 65g pieces (it might seem small… but trust me!). Flatten it out with your hands and fold in"the edges” in to form it into a round. Gently roll it against the counter a few times in order to create tension (which is what ultimately gives us the super nice fluff when proofing).
Cover with a kitchen towel and allow to rest until it they puff up nicely (1-2 hours)(its very temperature dependent, but you *really* do want them to double in size:)
8-12 a.m. fry away!
Quite literally any frying oil will work, but I would say that its really worth while to go for something like avocado or coconut oil (I surprisingly particularly enjoyed the latter, as I’m convinced that it keeps them fresh for a bit longer due to it leaving a very light coating behind)(but if you hate coconut anything just use avocado as its super neutral and also has a high smoke point)(but big bonus: coconut oil barely smells when frying and doesn’t linger for days lol)
Add enough cooking oil of choice and heat up over medium/high heat until temp reaches 360-370°F / 182-187°C (if I’m frying small amounts I’ll do it in a saucepan with just a few fingers of depth)(but do know that oil can be reused, just drain it properly of any solids).
Fry for 2 1/2-3 minutes on each side, or until nicely browned– keeping an eye on the oil temperature to ensure even cooking.
Dunk in sugary coating of choice right away and allow to rest for 15 minutes before filling (or until at room temp, particularly if you’re opting for pastry cream rather than jam).
And devour right away for prime freshness 😋


