‘Tis the week where time and space warp into an infinite continuum (and we find ourselves thinking back… and ahead).
And while there’s a lot that I wish had happened differently this year (honestly? mainly that I got to spend more time baking and chatting with you), in the end all the series of “unfortunate events” that culminated in my silence ended up being rather fortunate (it’s just something that I won’t be able to talk about for months, or even years, but I know you’ll understand then exactly what happened).
Still, understanding doesn’t in any way excuse– so I’m hoping you’ll let me make it up to you instead with a little gift to all of you who were paying subscribers in 2023 (yup, even if just for one month- I’m chasing y’all down!!).
i.e. VIP ANNOUNCEMENT 📣
if you are (or were) a paying subscriber please reply to this email with your name, shipping address and phone number
what are you getting?
A live (!!) little bundle of love: my 100+ year old starter Yosemite (yes, I’m sending them alive, so you’ll be ready to bake within one or two feedings)
(plus a little something extra)(and founding members are in for a special treat 🎁)
p.s. I know a handful of you are international, I’m researching what’s possible (within the bounds of international law lol)(but still send me your address pls)
p.p.s. if you already have a starter let me know, I got something else for you too
p.p.p.s. no need to feel left out, I’m gifting everyone* who starts a yearly subscription in January a little live clone of my prized starter to get you started on your sourdough adventure (they’re generally worth around $30)(and are much more valuable than a dehydrated one, as its a culture that’s been maintained for decades… and it shows).
get a years worth of exclusive recipes (and a live clone of my 100+ year old starter, Yosemite) 🌋
*keeping it to US based at the moment (I know, but I can’t very well send a live culture across an international border)(and I’m not yet clear on where we stand with a dehydrated one).
Alas, you’ll see plenty of fun changes around here this upcoming year– as you gotta give your time to whats important to you ;)
But onto today’s recipe: a classic of classics and an introduction into baking with a swift stiff starter, which results in an extra fluffy and unbelievably tender crumb.
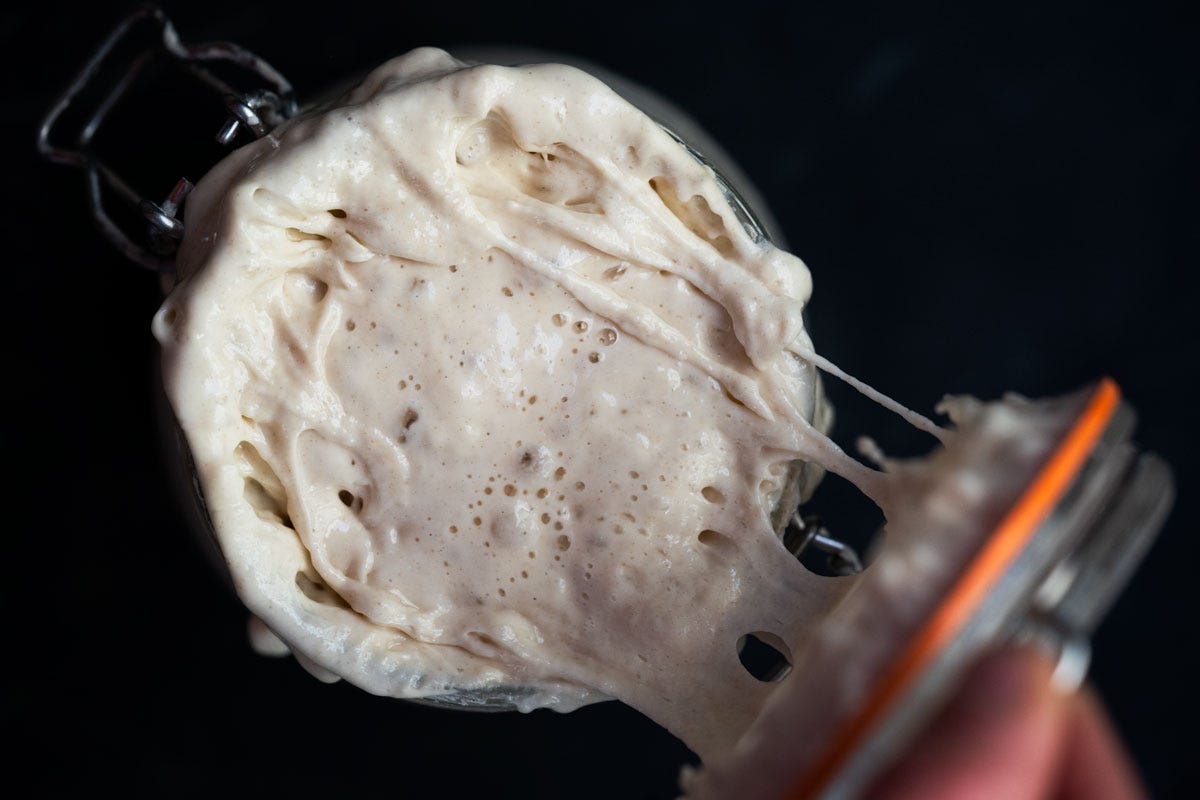
what’s a sweet stiff starter 👩🔬
Rather than bake with just an active sourdough starter, you’ll use it to create a sweet starter (i.e. levain) made out of flour, water and sugar. It’ll be stiff like a dough, but you’ll let it rise until it triples for 8-12 hours andthen make your dough.
And while it sounds like it’ll just add more time to the process, it effectively halves the bulk proofing time and you’ll see it create the lightest (and most intricate) web of gluten courtesy of simple chemistry.
You see– by adding sugar to the sourdough starter equation you’re creating osmotic stress, which in turn limits the reproduction of bacteria in your culture (responsible for the generation of lactic acid), therefore resulting in a much less sour dough.
But the imbalance doesn’t end there as yeast cultures in turn take over, leading to what I can only describe as truly impressive fluffiness.
⭐ brownie points ⭐: I also added a touch of almond flour to ensure that your rolls keep fresh for longer (as we all know it’s a race against staleness after the first 24 hours). So think of almond flour as a natural moisture preservative– releasing its oils post bake, keeping them moist and tender (yup, even after freezing they reheat unbelievably well)
I’m excited for you guys to try these two little knickknacks, that lead to big changes.
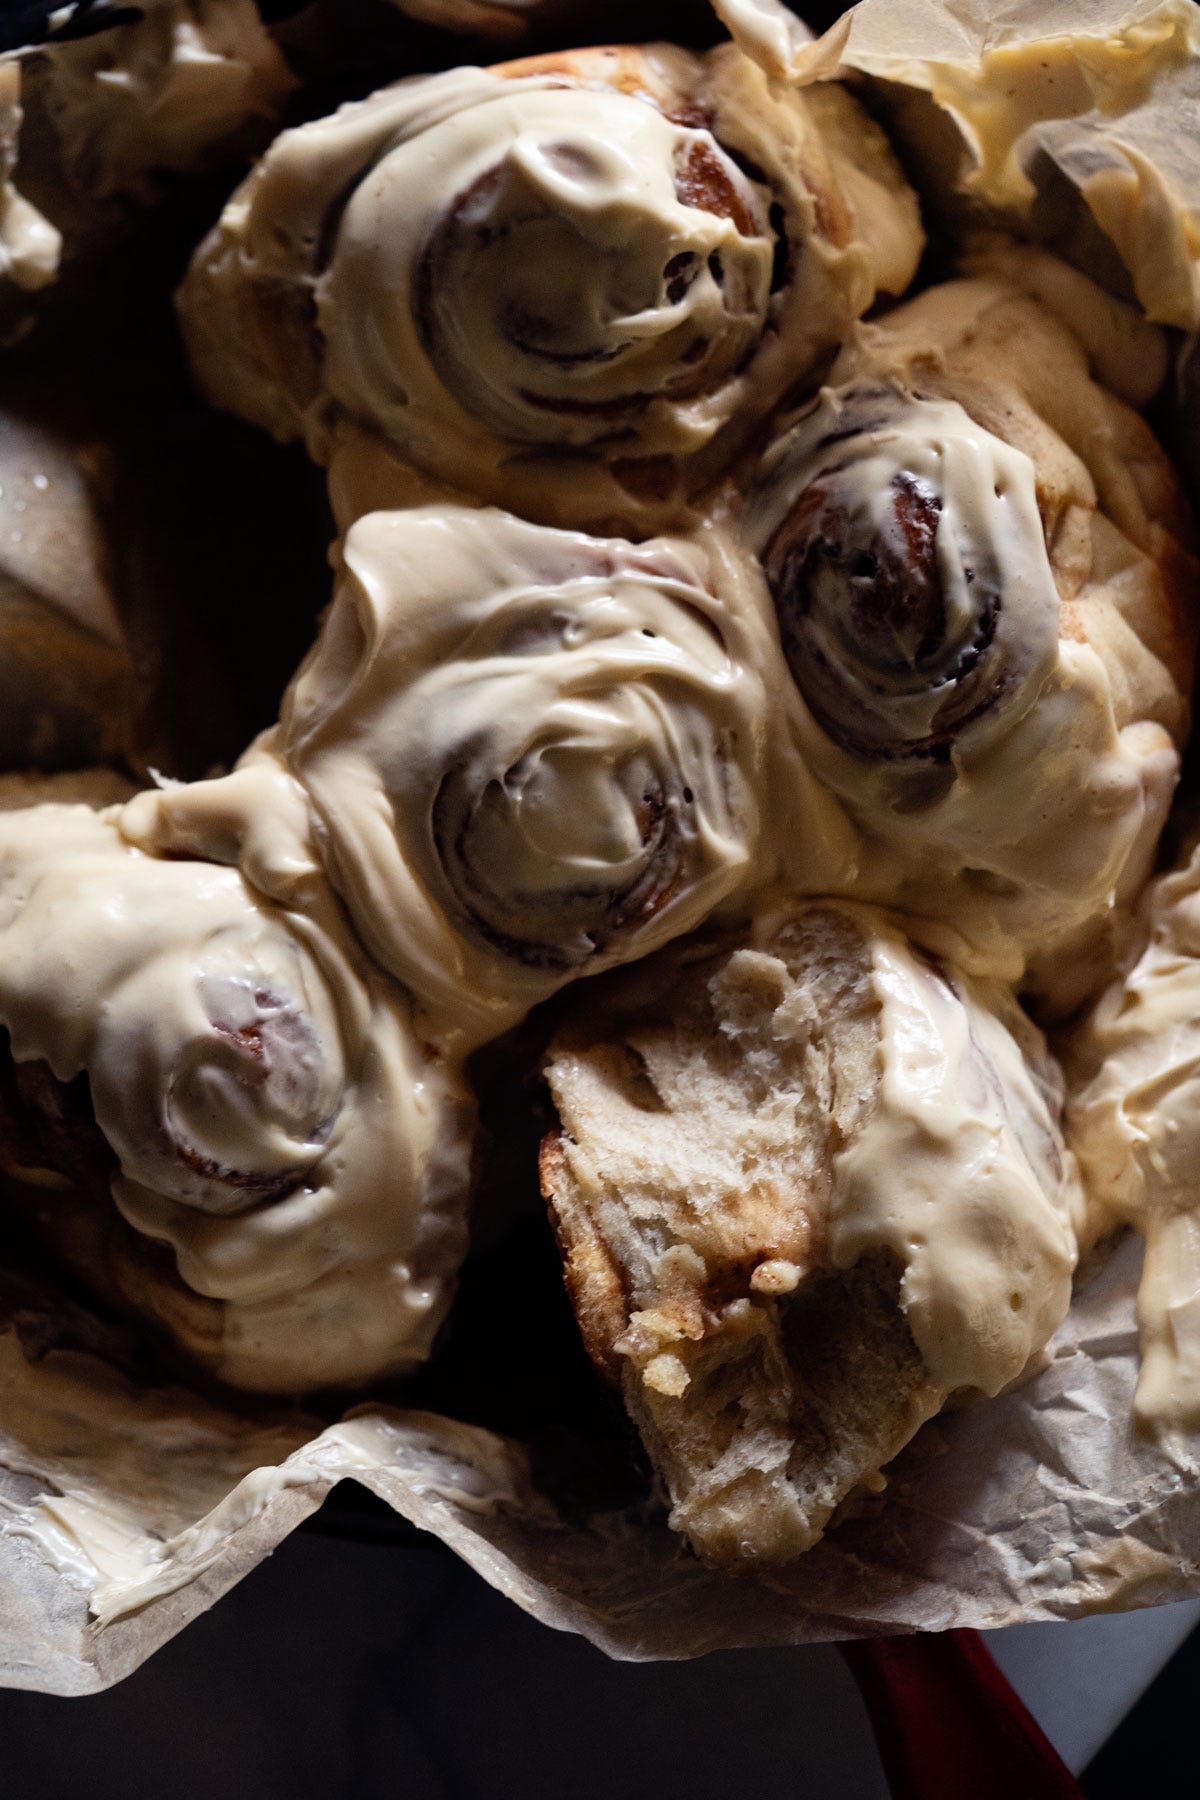
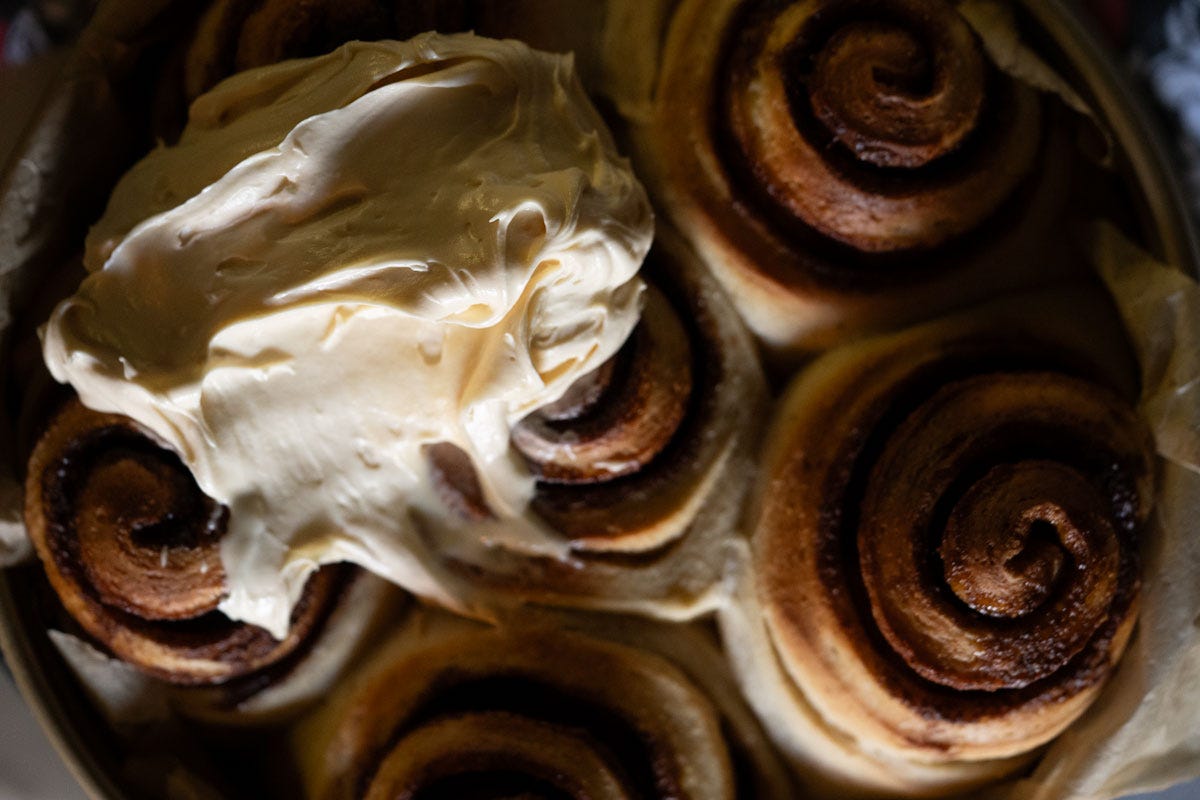
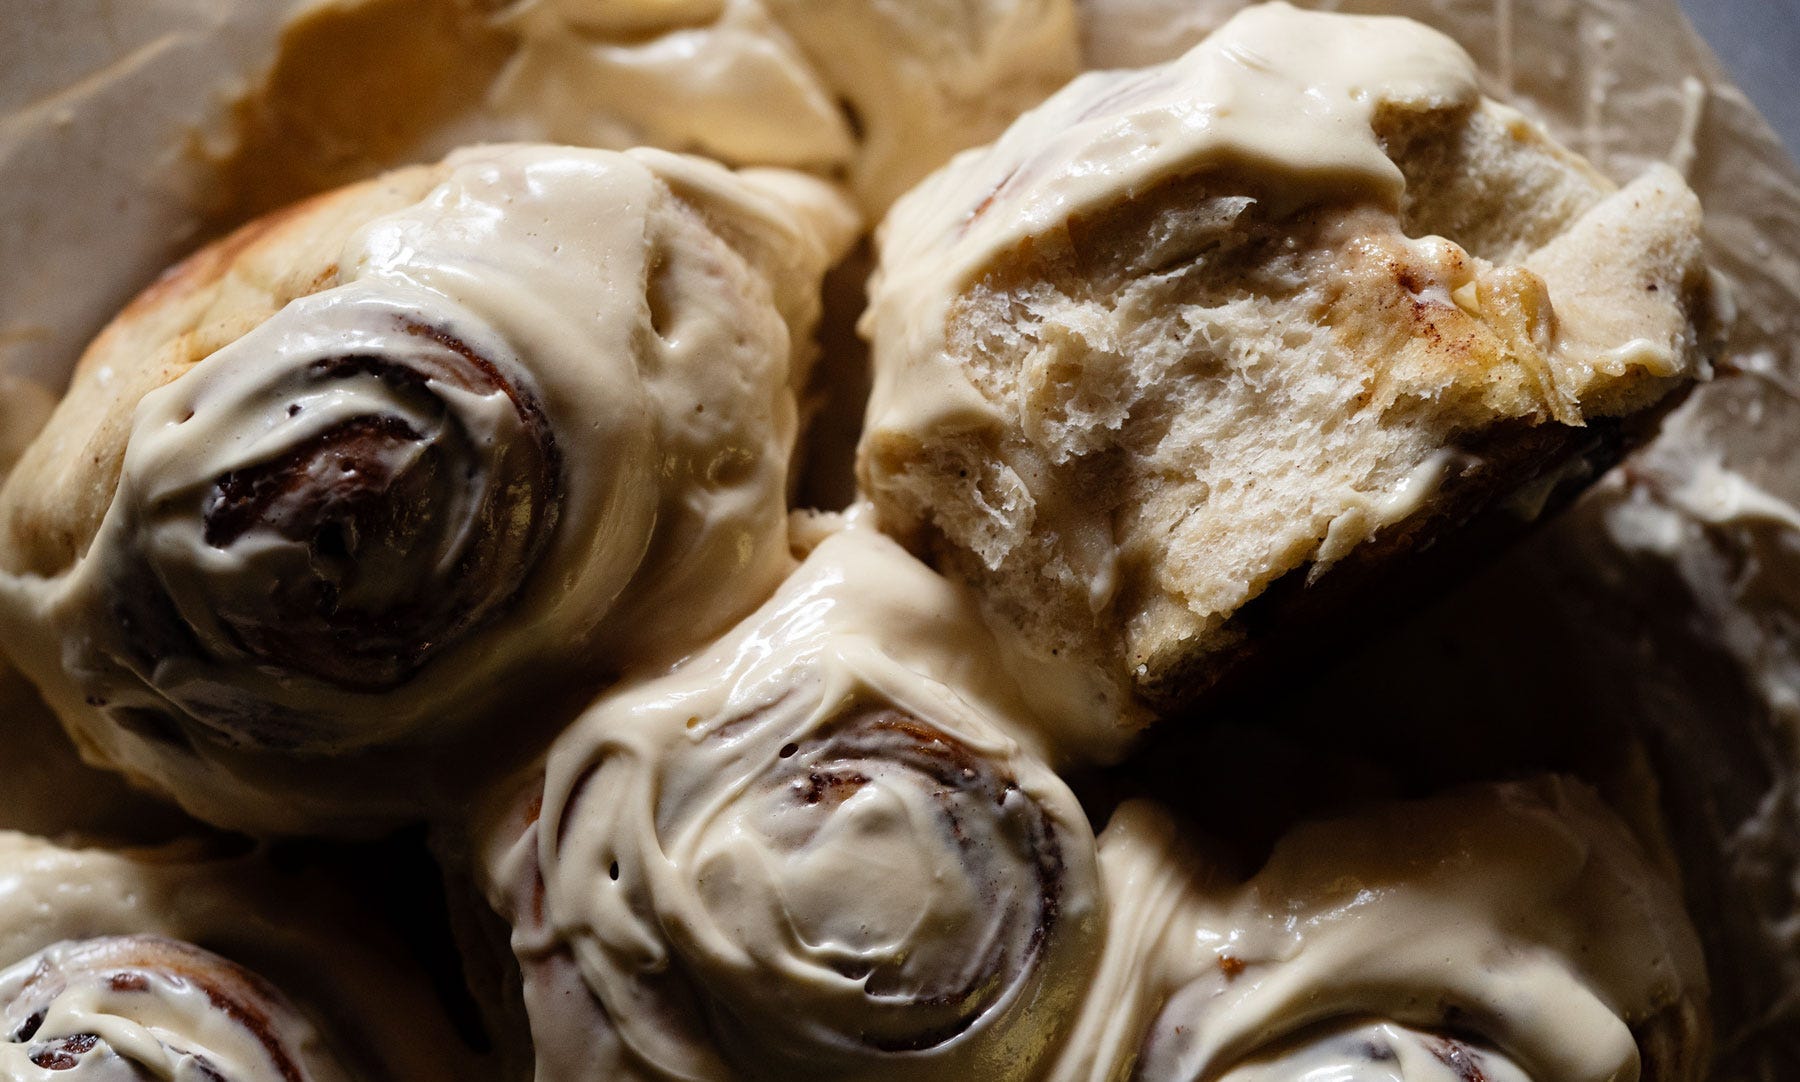
Big statement incoming: these might just be my favorite cinnamon rolls ever (and I really wouldn’t be surprised if they become yours too), for taste and texture are simply on point.
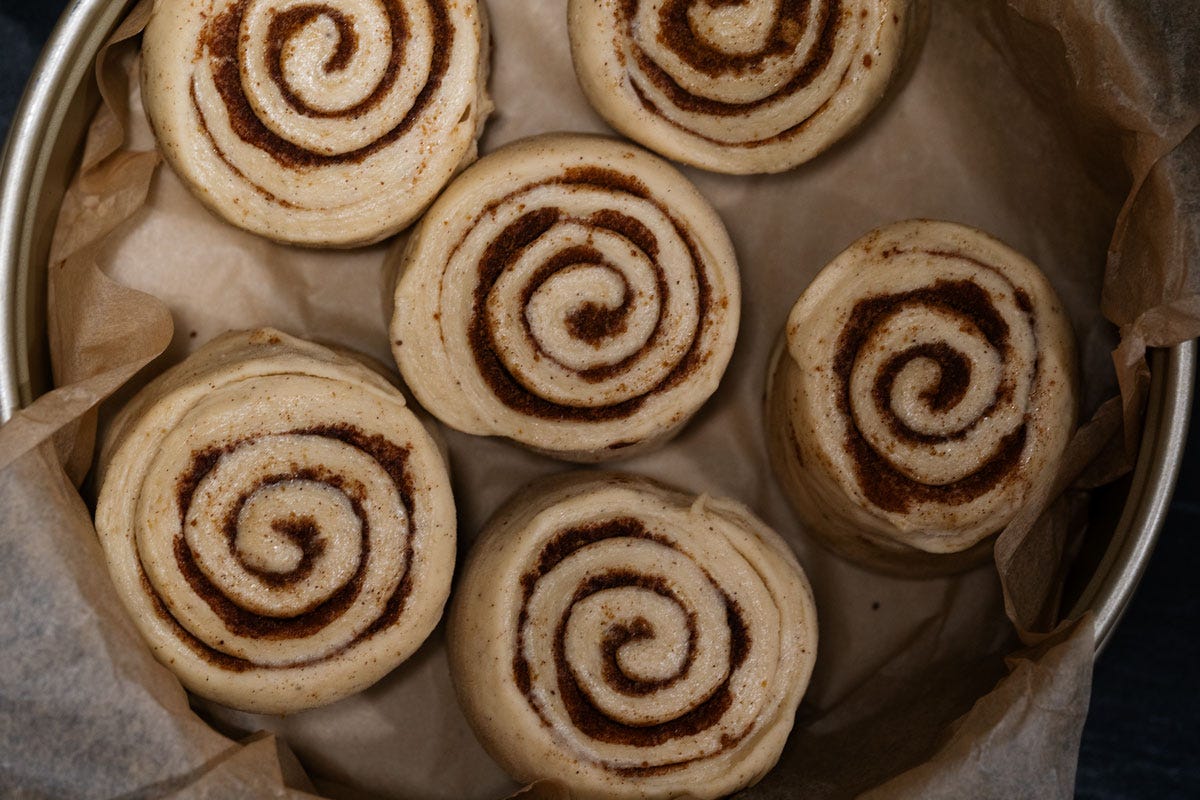
It makes 7 fairly gigantic rolls (i.e. you can also make 9 smaller ones)(but do know there’s a beauty in the texture of the large guys that you’d be missing out on a tad)(for there’s always a trade off in life).
for the sweet stiff starter
120g bread flour
50g springwater
40g active sourdough starter
20g sugar (works better than honey)
for the dough
all your sweet stiff starter
1 large egg, at room temp
1 egg yolk
24g raw honey (maple syrup or granulated sugar of choice)
2 teaspoons vanilla bean powder (optional, but a very nice touch)
Add 50g of flour to feed your starter (you need just 40g of active starter for the recipe, so it depends on how big you keep your starter (and if you’re taking yours out of the fridge you’ll mostdef need to do one feeding before it’s strong enough to bake with).
Add 50g spring water (you don’t want filtered, you really do want the added minerals)(this should tell you something too about what you should be drinking too btw 👀) and mix until the dough resembles a thick pancake batter.
Allow to rest for 3-6 hours in a warm(ish) place until doubled in size.
9 p.m. make your sweet stiff starter
Add all your ingredients to a medium bowl and knead them together until a stiff dough emerges (just ensure there are no pockets of flour).
Form a round, transfer to a wide-rim jar and allow it to proof in a warm spot until tripled in size (8-12 hours).
Note: know that you can refrigerate your sss for 12-24 hours once its nearly tripled, just bring it back to room temperature before baking with it.
7 a.m. make your dough
My best advice: just ensure everything is at room temp to give your culture the best fighting chance (and watch the recipe video!). Other than that, you’ll be surprised how simple the process is (and how little you have to do, it just takes time).
Add sweet stiff starter, eggs and honey to the bowl of your stand mixer and mix, until just combined, using the paddle attachment. Add in the milk and mix again.
Set your mixer on low and add the flour in parts until just combined. Add in the salt and continue mixing until everything looks nice and incorporated (about a minute). Yup, the dough is pretty sticky at this point!
Cover with a damp paper towel and let it rest for 30 minutes.
Switch to the dough hook attachment on your mixer and “knead” on medium speed for 8-10 minutes, adding a pad of butter at a time (it really needs to be at room temp so that it incorporates seamlessly!) . The dough will be sleek and pull away from the sides at this point (if it isn’t, just sprinkle a tad of flour at a time, think a tablespoon or two, and kneed for a bit longer).
Add your almond flour and kneed until incorporated. Your dough should be at (or very near) windowpane by now– test it by stretching it, you want it to be translucent. If it feels a bit stiff don’t worry, knead it for a couple more minutes, let it rest for thirty minutes and do a set of stretch and folds (the sourdough cultures will take care of it).
10-1 p.m. bulk rise
Transfer to a smaller bowl (as it’s easier to gauge the rise if you can actually mark it with a sharpie) and cover with cling film.
Allow to proof in a warm spot for 3-5 hours, or until at least doubled in size (but I generally let mine go until it almost tripes as I personally find it easiest to digest).
Note: once it doubles is a good time to refrigerate the dough if you don’t intend to bake the same day.
shape
Line a 9-inch springform pan with parchment paper and set aside (I prefer it over cast iron or ceramic as these have a tendency to create thicker crusts in breads).
Lightly flour your working surface, turn the dough out and stretch it out gently (allow it to rest for 10 minutes if it “feels” like it’s resisting)(you’ll know, trust me!). Add a tad bit more flour and roll it out into a roughly 12x16” rectangle.
Spread the softened butter, and sprinkle with cinnamon sugar.
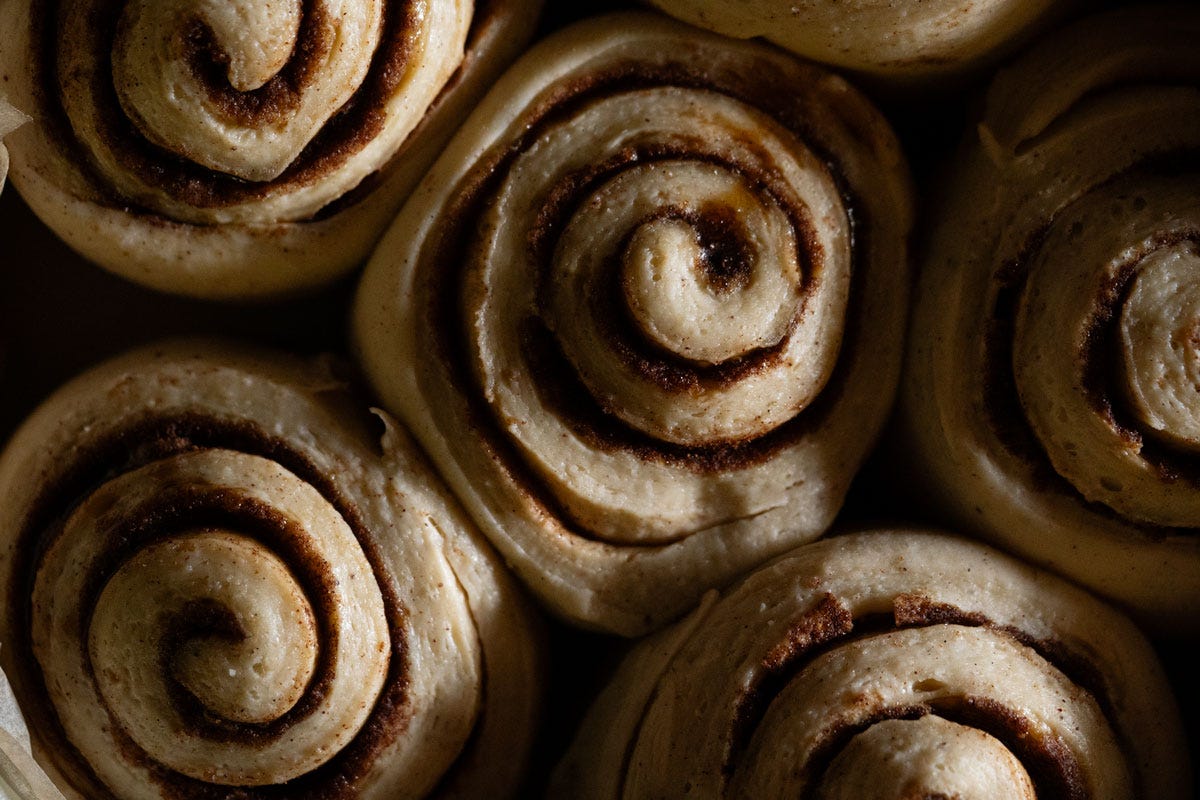
Cut up into roughly 2-inch sections and transfer to the prepared pan (you can use dental floss, but tbch I’ve never had an issue with just using a knife.. and its easier).
Cover with a kitchen towel and allow to rest until they puff up nicely (1-2 hours).
bake away!
Preheat oven to 350°F/180°C.
Bake on the center rack for 25-30 minutes, checking in at minute 15 for over-browning. The top will be a nice golden brown once they’re ready (but be sure to tent with foil if they begin to brown to quickly).
Allow to rest for 15 minutes before serving.
Make your glaze in the meantime by beating the butter with the cream cheese until soft and fluffy (3-4 minutes). Sweeten to taste (you’ll be surprised how little honey you need when using quality ingredients), mix in a touch of vanilla and a good pinch of salt.
Spread onto the warm rolls and enjoy *imminently*.
p.s.it’s best to store them unglazed at room temp in an airtight container (you’ll be surprised the wonders the touch of almond does to keep them moist), just give them a quick reheat. Otherwise I froze half this batch frosted and that was OK too, the frosting just gets a bit messy while reheating.


Share this post